“Take your AR15 to the next level with our step-by-step upper upgrade guide.”

Choosing the Right Upper Receiver
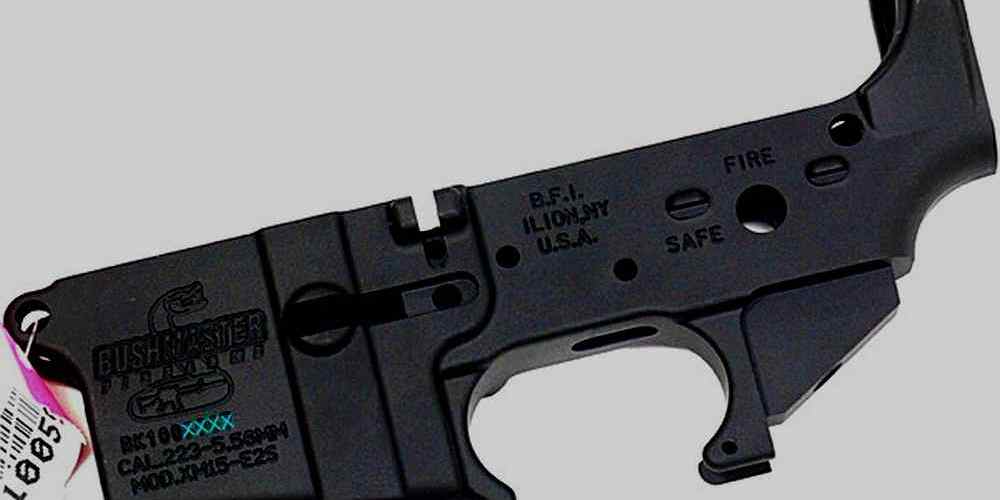
If you’re looking to upgrade your AR15 rifle, one of the most popular modifications you can make is to replace the upper receiver. The upper receiver is a critical component of the AR15, housing the barrel, bolt carrier group, and other key parts of the firearm. Choosing the right upper receiver for your AR15 can be a daunting task, but with a little knowledge and guidance, you can make the right choice for your needs.

When selecting an upper receiver, there are a few key factors to consider. The first is the material of the receiver. Upper receivers are typically made from either aluminum or polymer. Aluminum receivers are more durable and offer better heat dissipation, making them a popular choice for serious shooters. Polymer receivers, on the other hand, are lighter and more affordable, making them a good option for casual shooters or those on a budget.
Another important factor to consider is the style of the upper receiver. There are two main styles to choose from: the traditional flat top receiver and the railed receiver. The flat top receiver is the standard style found on most AR15 rifles and is compatible with a variety of optics and accessories. The railed receiver, on the other hand, features a built-in rail system for attaching accessories like scopes, lights, and grips. Consider how you plan to use your rifle and what accessories you may want to add when choosing the style of your upper receiver.
Once you’ve selected the right upper receiver for your needs, it’s time to install it on your AR15. The installation process can vary depending on the specific model of upper receiver you’ve chosen, but the basic steps are the same. To begin, make sure your rifle is unloaded and the safety is engaged. Remove the rear takedown pin and pivot pin to separate the upper and lower receivers. Next, remove the charging handle and bolt carrier group from the upper receiver.

With the upper receiver separated from the lower receiver, you can now install the new upper receiver. Start by inserting the charging handle into the new upper receiver, followed by the bolt carrier group. Slide the upper receiver onto the lower receiver, making sure the takedown and pivot pins are properly aligned. Once the upper and lower receivers are connected, reinsert the takedown and pivot pins to secure them together.
Finally, test the function of your rifle to ensure everything is working properly. Cycle the charging handle and bolt carrier group to make sure they move smoothly. Check the safety and trigger to ensure they function correctly. If everything is in working order, you’re ready to hit the range and test out your upgraded AR15.
Upgrading your AR15 upper receiver is a great way to customize your rifle and improve its performance. By choosing the right upper receiver for your needs and following a few simple steps, you can easily install it on your AR15 and take your shooting to the next level. Whether you’re a seasoned shooter or new to the world of firearms, upgrading your AR15 upper receiver is a rewarding experience that can enhance your shooting experience.
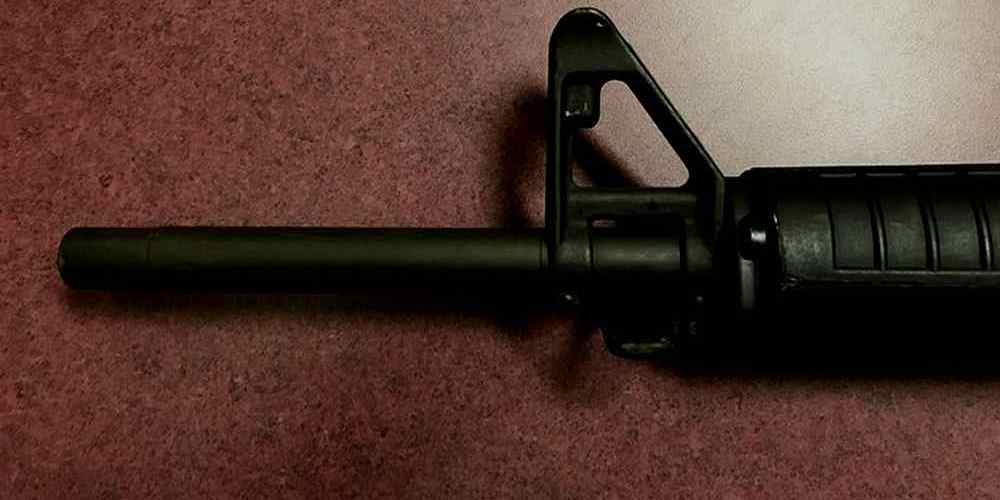
Installing the Barrel
So you’ve decided to upgrade your AR15 upper, and you’re ready to tackle the installation process. One of the most crucial steps in this process is installing the barrel. This step requires precision and attention to detail to ensure that your firearm functions properly and safely. In this guide, we will walk you through the steps of installing the barrel on your AR15 upper.
First and foremost, make sure you have all the necessary tools and components for this installation. You will need a barrel nut wrench, a torque wrench, a vise block, and of course, your new barrel. Before you begin, ensure that your work area is clean and well-lit to prevent any mishaps during the installation process.
To start, place your upper receiver in a vise block to secure it in place. This will make it easier to work on the barrel installation. Next, carefully slide the barrel into the upper receiver, making sure that the barrel extension lines up with the receiver’s feed ramps. Once the barrel is in place, hand-tighten the barrel nut onto the receiver threads.
Now it’s time to use the barrel nut wrench to tighten the barrel nut to the proper torque specifications. Refer to your barrel manufacturer’s instructions for the specific torque value required for your barrel. Using a torque wrench will ensure that the barrel nut is tightened to the correct specifications, preventing any issues with the barrel’s alignment or function.
After tightening the barrel nut, check to ensure that the gas tube hole lines up properly with the gas port in the barrel. This alignment is crucial for proper gas flow and function of your AR15. If the gas tube hole is not aligned, you may need to adjust the barrel nut slightly to correct the alignment.
Once the barrel nut is properly torqued and the gas tube hole is aligned, you can install the gas block onto the barrel. Slide the gas block onto the barrel and secure it in place using the set screws provided with the gas block. Make sure the gas block is aligned properly with the gas port on the barrel to ensure proper gas flow.
With the gas block installed, you can now attach the gas tube to the gas block. Slide the gas tube into the gas block and secure it in place using the roll pin provided with the gas block. Make sure the gas tube is properly aligned with the gas block to prevent any issues with gas flow.
Finally, double-check all of your work to ensure that everything is properly installed and aligned. Check the barrel nut torque, gas block alignment, and gas tube installation to ensure that your AR15 upper is ready for use. Once you have completed these steps, you can move on to installing the handguard and other accessories onto your upgraded AR15 upper.
By following these step-by-step instructions, you can successfully install a new barrel on your AR15 upper. Remember to take your time and pay attention to detail to ensure that your firearm functions properly and safely. With a little patience and the right tools, you can upgrade your AR15 upper with confidence.
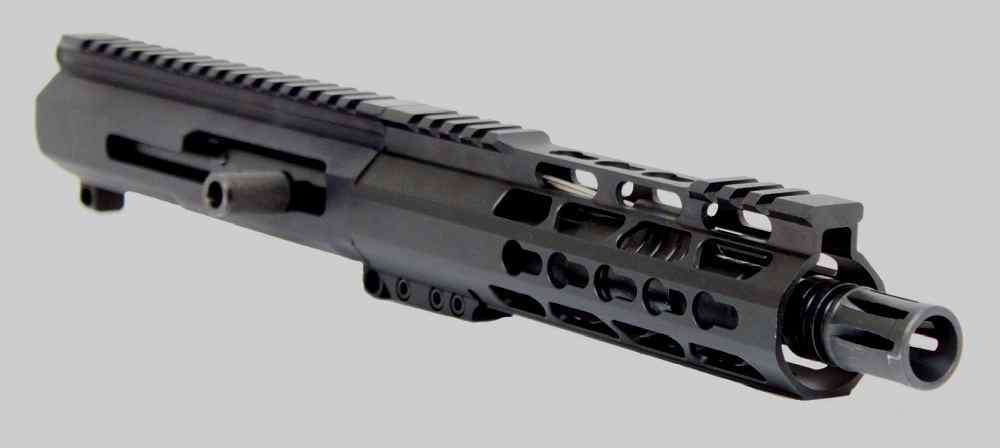
Adding a Handguard
If you’re looking to upgrade your AR15 upper, one of the first things you might want to consider is adding a new handguard. A handguard not only enhances the look of your rifle but also provides additional functionality and customization options. In this step-by-step installation guide, we’ll walk you through the process of adding a handguard to your AR15.
Before you begin, make sure you have all the necessary tools and parts for the installation. You’ll need a wrench, a screwdriver, and the handguard kit that you’ve chosen for your rifle. It’s also a good idea to have a clean workspace and some protective gear, such as gloves and safety glasses.
The first step in adding a handguard to your AR15 is to remove the existing handguard. Start by removing any accessories or attachments that are mounted on the handguard, such as a sling mount or a flashlight. Once these are removed, use your wrench to loosen and remove the screws or bolts that are holding the handguard in place. Carefully slide the handguard off the rifle, being mindful of any wires or cables that may be attached.
With the old handguard removed, it’s time to install the new handguard. Start by aligning the new handguard with the barrel nut on your rifle. Depending on the design of your handguard, you may need to slide it over the barrel or attach it to the barrel nut using screws or bolts. Once the handguard is in place, tighten the screws or bolts to secure it to the rifle.
Next, you’ll want to make sure that the handguard is properly aligned with the upper receiver of your AR15. This will ensure that your accessories, such as a scope or a laser sight, are properly mounted and aligned with the barrel of the rifle. Use a level or a straight edge to check the alignment of the handguard with the upper receiver, and make any necessary adjustments.
Once the handguard is properly aligned and secured to the rifle, you can begin reattaching any accessories or attachments that you removed earlier. Make sure that these are securely mounted to the handguard and that they are properly aligned with the barrel of the rifle.
Finally, give your rifle a thorough inspection to make sure that everything is properly installed and secured. Check for any loose screws or bolts, and make sure that all accessories are mounted securely. Once you’re satisfied with the installation, take your rifle to the range for some test firing to ensure that everything is functioning properly.
Adding a handguard to your AR15 is a relatively simple process that can be completed in just a few steps. With the right tools and a little bit of patience, you can give your rifle a fresh new look and added functionality. So why wait? Upgrade your AR15 upper today with a new handguard and take your shooting experience to the next level.
Upgrading the Bolt Carrier Group
If you’re looking to upgrade your AR15 upper, one of the key components you may want to consider replacing is the bolt carrier group. The bolt carrier group is a critical part of the AR15’s operation, responsible for chambering rounds, extracting spent casings, and cycling the action. Upgrading to a high-quality bolt carrier group can improve the reliability and performance of your rifle.
When selecting a new bolt carrier group, there are a few key factors to consider. First and foremost, you’ll want to ensure that the bolt carrier group is compatible with your AR15 upper. Most bolt carrier groups are designed to fit standard AR15 rifles, but it’s always a good idea to double-check before making a purchase.
In addition to compatibility, you’ll also want to consider the material and finish of the bolt carrier group. Most bolt carrier groups are made from either 8620 steel or 9310 steel, both of which are durable and reliable materials. As for the finish, options include phosphate, nitride, and nickel boron coatings, each offering different levels of corrosion resistance and lubricity.
Once you’ve selected a bolt carrier group that meets your needs, it’s time to install it in your AR15 upper. The process is relatively straightforward, but it’s important to take your time and follow the steps carefully to ensure a proper installation.
To begin, make sure your AR15 upper is clear and safe to work on. Remove the upper receiver from the lower receiver and place it on a flat, stable surface. Next, remove the charging handle and bolt carrier group from the upper receiver by pulling the charging handle to the rear and then lifting out the bolt carrier group.
With the old bolt carrier group removed, it’s time to install the new one. Start by inserting the new bolt carrier group into the upper receiver, making sure the bolt face is oriented correctly. Slide the bolt carrier group all the way to the rear of the upper receiver, then insert the charging handle and push it forward to lock the bolt carrier group in place.
Once the bolt carrier group is installed, cycle the action a few times to ensure everything is functioning properly. Check for any binding or resistance in the action, and make any necessary adjustments before reassembling your AR15 upper.
With the new bolt carrier group installed, you can expect improved reliability and performance from your AR15 rifle. Whether you’re a seasoned shooter looking to upgrade your rifle or a beginner looking to customize your AR15, upgrading the bolt carrier group is a simple and effective way to enhance your shooting experience.
In conclusion, upgrading the bolt carrier group in your AR15 upper is a worthwhile investment that can improve the reliability and performance of your rifle. By selecting a high-quality bolt carrier group and following the steps outlined in this guide, you can easily install the new component and enjoy the benefits of a smoother, more reliable shooting experience. So why wait? Upgrade your AR15 upper today and take your shooting to the next level.
Installing a New Muzzle Device
If you’re looking to upgrade your AR15 upper, one of the key components you may want to consider replacing is the muzzle device. A new muzzle device can improve the performance and aesthetics of your rifle, and with the right tools and know-how, it’s a relatively simple upgrade to make. In this step-by-step installation guide, we’ll walk you through the process of installing a new muzzle device on your AR15.
Before you begin, make sure you have all the necessary tools and equipment on hand. You’ll need a vise, a vise block, a torque wrench, and the new muzzle device you’ll be installing. It’s also a good idea to have some gun oil or lubricant handy to help with the installation process.
To start, remove the upper receiver from your AR15 and secure it in a vise using a vise block. This will provide a stable platform for you to work on and ensure that you don’t damage the receiver during the installation process.
Next, use a wrench to loosen and remove the existing muzzle device from the barrel. Depending on the type of muzzle device you have, this may require some force, so be prepared to apply some elbow grease if necessary. Once the old muzzle device is removed, clean the threads on the barrel to ensure a smooth and secure fit for the new device.
Now it’s time to install the new muzzle device. Apply a small amount of gun oil or lubricant to the threads on the barrel to help with the installation process. Then, carefully thread the new muzzle device onto the barrel by hand, making sure it is aligned properly and seated securely.
Once the muzzle device is hand-tightened, use a torque wrench to tighten it to the manufacturer’s recommended torque specifications. This will ensure that the muzzle device is securely attached to the barrel and will not come loose during use.
Finally, reassemble your AR15 and test fire it to ensure that the new muzzle device is functioning properly. If everything looks good, you’re all set to hit the range and enjoy your upgraded rifle.
Installing a new muzzle device on your AR15 is a simple and straightforward process that can make a big difference in the performance and appearance of your rifle. With the right tools and a little know-how, you can easily upgrade your AR15 upper and take your shooting experience to the next level.
So don’t be afraid to get your hands dirty and give your AR15 the upgrade it deserves. Follow this step-by-step installation guide, and you’ll be well on your way to enjoying a more accurate and stylish rifle in no time. Happy shooting!