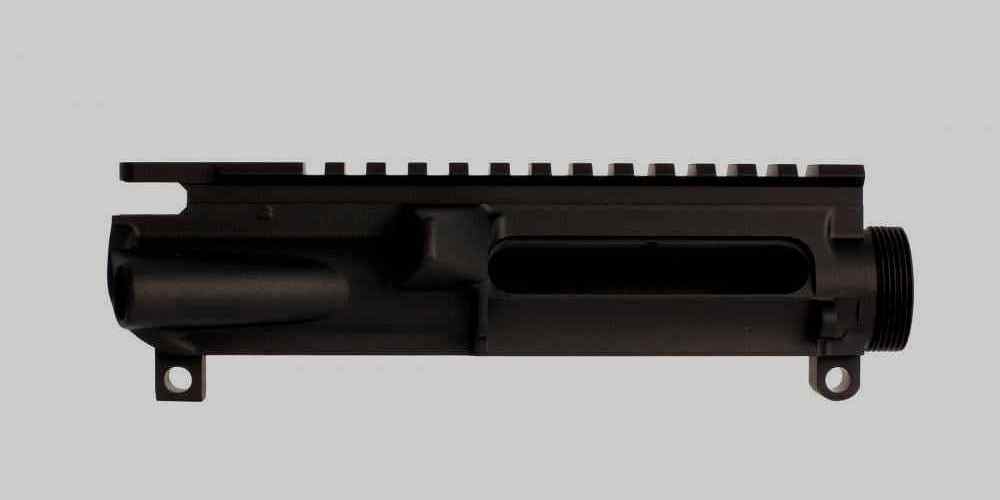
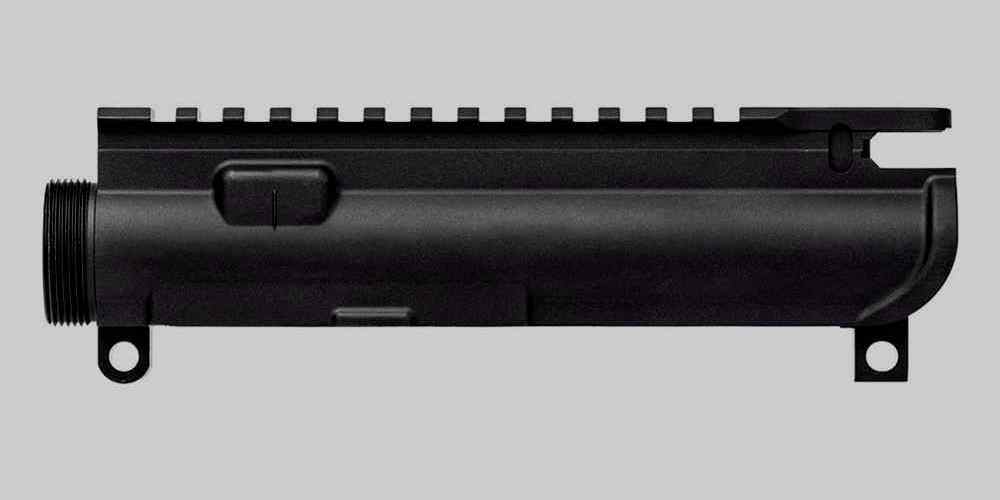
“Build your own AR15 upper receiver, one piece at a time.”
Building a Custom AR15 Lower Receiver
Building your own AR15 can be a rewarding and satisfying project for any gun enthusiast. While assembling a lower receiver is a common starting point for many DIY AR15 projects, assembling an upper receiver from scratch can be just as fulfilling. In this article, we will guide you through the process of building a custom AR15 upper receiver, step by step. The first step in assembling an upper receiver is to gather all the necessary components and tools. You will need an upper receiver, barrel, gas block, gas tube, handguard, bolt carrier group, charging handle, and muzzle device. Additionally, you will need a vise, torque wrench, armorers wrench, and punch set to complete the assembly. Once you have all the components and tools ready, the next step is to install the barrel onto the upper receiver. Start by inserting the barrel into the receiver and securing it with the barrel nut. Use the torque wrench to tighten the barrel nut to the manufacturer’s specifications. Make sure the gas tube lines up properly with the gas port on the barrel. Next, install the gas block onto the barrel. Slide the gas block onto the barrel and secure it in place with the set screws. Make sure the gas block is aligned properly with the gas port on the barrel to ensure proper gas flow. After installing the gas block, insert the gas tube into the gas block and secure it with the roll pin. Make sure the gas tube is properly aligned with the gas port on the barrel to allow for proper gas flow. The next step is to install the handguard onto the upper receiver. Slide the handguard onto the barrel and secure it in place with the mounting hardware. Make sure the handguard is properly aligned with the upper receiver to ensure a secure fit. Once the handguard is installed, it’s time to install the bolt carrier group into the upper receiver. Slide the bolt carrier group into the receiver and secure it in place with the charging handle. Make sure the bolt carrier group moves freely within the receiver to ensure proper function. Finally, install the muzzle device onto the barrel. Slide the muzzle device onto the barrel and secure it in place with the crush washer or lock nut. Make sure the muzzle device is properly aligned with the barrel to ensure proper bullet trajectory. Congratulations! You have successfully assembled your custom ar15 upper receiver from scratch. Take the time to inspect your work and make any necessary adjustments before test firing your rifle. Building your own AR15 can be a challenging but rewarding experience, and assembling an upper receiver from scratch is a great way to customize your rifle to your liking. In conclusion, building a custom AR15 upper receiver from scratch is a great way to personalize your rifle and enhance your shooting experience. With the right components and tools, anyone can tackle this project and create a one-of-a-kind firearm. So roll up your sleeves, gather your parts, and get ready to build your very own custom AR15 upper receiver. Happy building!
Upgrading AR15 Trigger Systems
If you’re a gun enthusiast looking to take your AR15 to the next level, upgrading the trigger system is a great place to start. A smooth, crisp trigger pull can greatly improve accuracy and overall shooting performance. While there are many aftermarket trigger systems available on the market, some DIY enthusiasts may prefer to assemble their own trigger system from scratch. In this article, we’ll walk you through the process of upgrading your AR15 trigger system by assembling an upper receiver from scratch. Before we dive into the assembly process, it’s important to understand the components of an AR15 trigger system. The trigger system consists of the trigger, hammer, disconnector, and springs. These components work together to release the hammer and fire the rifle when the trigger is pulled. Upgrading these components can result in a lighter trigger pull, reduced trigger creep, and improved overall performance. To begin the assembly process, you’ll need to gather the necessary tools and components. You’ll need a hammer, trigger, disconnector, springs, and pins. It’s important to ensure that all components are compatible with your AR15 model before proceeding with the assembly. Start by installing the trigger into the lower receiver. Insert the trigger into the trigger slot and secure it in place with the trigger pin. Next, install the disconnector and hammer into the lower receiver. Make sure that the disconnector is properly aligned with the trigger and that the hammer is positioned correctly. Once the trigger, disconnector, and hammer are installed, it’s time to install the springs. The trigger spring should be installed on the trigger, while the hammer spring should be installed on the hammer. Make sure that the springs are properly seated and do not interfere with the movement of the trigger or hammer. After installing the springs, test the trigger system to ensure that it functions properly. Pull the trigger to release the hammer and check for any issues such as trigger creep or misfires. If everything is working correctly, you can proceed with assembling the upper receiver. To assemble the upper receiver, you’ll need to install the upper receiver onto the lower receiver. Make sure that the upper receiver is properly aligned with the lower receiver and secure it in place with the takedown pin. Next, install the bolt carrier group and charging handle into the upper receiver. Once the upper receiver is assembled, test the trigger system again to ensure that it functions properly. If you encounter any issues, double-check the alignment of the trigger, disconnector, and hammer, as well as the installation of the springs. In conclusion, upgrading your AR15 trigger system by assembling an upper receiver from scratch can greatly improve the performance of your rifle. By following the steps outlined in this article and ensuring that all components are properly installed, you can achieve a smooth, crisp trigger pull that enhances accuracy and overall shooting performance. So why wait? Get started on your DIY AR15 project today and take your shooting experience to the next level.
Installing a Free Float Handguard on an AR15
If you’re a gun enthusiast looking to take your AR15 to the next level, installing a free float handguard is a great DIY project to tackle. Not only does it enhance the look of your rifle, but it also improves accuracy and allows for better customization options. In this article, we’ll walk you through the steps of installing a free float handguard on your AR15. Before you begin, make sure you have all the necessary tools and parts. You’ll need a free float handguard kit, a barrel nut wrench, a torque wrench, and some anti-seize lubricant. It’s also a good idea to have a vise block and an upper receiver vise block to securely hold your AR15 in place during the installation process. The first step is to remove the existing handguard from your AR15. Start by removing any accessories or optics attached to the handguard. Then, use a handguard removal tool or a strap wrench to loosen and remove the handguard from the barrel nut. Be careful not to damage the barrel nut or the upper receiver during this process. Once the old handguard is removed, it’s time to install the new free float handguard. Begin by applying a small amount of anti-seize lubricant to the threads of the barrel nut. This will help prevent the nut from seizing up over time and make it easier to remove in the future. Next, slide the new handguard over the barrel and align it with the upper receiver. Make sure the handguard is seated properly against the barrel nut before tightening it down. Use the barrel nut wrench to secure the handguard in place, making sure it is aligned correctly with the upper receiver. Once the handguard is in place, it’s time to torque down the barrel nut to the manufacturer’s specifications. Use a torque wrench to tighten the nut to the recommended torque setting, usually around 30-40 ft-lbs. Be sure to follow the manufacturer’s instructions carefully to avoid over-tightening or damaging the barrel nut. After the barrel nut is torqued down, double-check the alignment of the handguard with the upper receiver. Make any necessary adjustments to ensure a proper fit and finish. Once everything is aligned correctly, your new free float handguard is ready to go. Installing a free float handguard on your AR15 is a relatively simple DIY project that can be completed in just a few hours. With the right tools and a little patience, you can give your rifle a custom look and improved performance. So why not give it a try and take your AR15 to the next level with a new free float handguard?
Customizing AR15 Stocks and Grips
If you’re a gun enthusiast looking to take your AR15 customization to the next level, assembling an upper receiver from scratch is a challenging yet rewarding project. The upper receiver is a crucial component of the AR15, housing the barrel, bolt carrier group, and other key parts. By building your upper receiver, you have the freedom to choose every component and create a truly personalized firearm. Before diving into the project, it’s important to have a clear understanding of the parts involved in an upper receiver assembly. The key components include the upper receiver itself, barrel, gas block, gas tube, handguard, charging handle, and bolt carrier group. Each of these parts plays a vital role in the function and performance of your AR15, so it’s essential to choose high-quality components that are compatible with each other. When selecting a barrel for your custom upper receiver, consider factors such as length, twist rate, and material. The barrel length will impact the overall size and weight of your AR15, while the twist rate determines the optimal bullet weight and velocity for your intended use. Stainless steel and chrome-moly are popular barrel materials, each offering its own benefits in terms of durability and accuracy. The gas block and gas tube work together to regulate the flow of gas from the barrel to cycle the action of the AR15. There are several types of gas blocks available, including low-profile and adjustable options. The gas tube connects the gas block to the upper receiver and should be the correct length for your barrel length. The handguard is another important component of the upper receiver, providing a mounting platform for accessories such as optics, lights, and grips. There are a wide variety of handguard styles available, including free-floating and drop-in designs. Consider the weight, length, and attachment method of the handguard when making your selection. The charging handle is responsible for cocking the AR15 and chambering a round. While most charging handles are similar in function, there are ambidextrous and extended options available for added convenience and ergonomics. Choose a charging handle that fits your shooting style and preferences. Finally, the bolt carrier group is the heart of the AR15, responsible for loading, firing, and ejecting rounds. When assembling your upper receiver, ensure that the bolt carrier group is properly headspaced to the barrel for reliable and safe operation. Consider upgrading to a high-performance bolt carrier group for improved durability and reliability. Assembling an upper receiver from scratch requires patience, attention to detail, and the right tools. A vise, torque wrench, and armorer’s wrench are essential for properly installing and torquing components. Follow manufacturer instructions and guidelines to ensure that each part is installed correctly and securely. Once your custom upper receiver is assembled, take the time to test fire and zero your AR15 to ensure proper function and accuracy. Make any necessary adjustments or upgrades to fine-tune your firearm to your liking. With a custom upper receiver, you can take pride in knowing that you’ve built a one-of-a-kind AR15 that reflects your personal style and preferences.
Building a Lightweight AR15 for Competition Shooting
If you’re a competitive shooter looking to build a lightweight AR15 for your next match, assembling an upper receiver from scratch can be a rewarding and cost-effective project. By building your upper receiver, you have the flexibility to choose the components that best suit your shooting style and preferences. In this article, we’ll walk you through the process of assembling an upper receiver for your lightweight AR15. The first step in building your upper receiver is to gather all the necessary components. You’ll need a stripped upper receiver, a barrel, a gas block, a gas tube, a handguard, a muzzle device, a charging handle, and a bolt carrier group. Make sure to choose components that are compatible with each other and that meet your performance requirements. Once you have all the components, the next step is to install the barrel onto the upper receiver. Start by inserting the barrel into the receiver and securing it with the barrel nut. Use a torque wrench to tighten the barrel nut to the manufacturer’s specifications. Next, install the gas block onto the barrel and secure it with the appropriate screws. After installing the gas block, attach the gas tube to the gas block and upper receiver. Make sure the gas tube is properly aligned and secured in place. The gas tube plays a crucial role in cycling the action of your AR15, so it’s important to ensure it is installed correctly. With the barrel, gas block, and gas tube in place, it’s time to install the handguard onto the upper receiver. Slide the handguard over the barrel and align it with the receiver. Secure the handguard in place using the provided screws or mounting hardware. The handguard not only provides a mounting platform for accessories but also protects your hands from the heat generated during firing. Once the handguard is installed, attach the muzzle device to the end of the barrel. The muzzle device helps reduce recoil and muzzle rise, improving your shooting performance. Make sure the muzzle device is properly aligned and tightened to prevent it from coming loose during shooting. With the barrel, gas block, handguard, and muzzle device installed, it’s time to attach the charging handle and bolt carrier group to the upper receiver. Slide the charging handle into the receiver and secure it in place. Next, insert the bolt carrier group into the receiver and ensure it is properly aligned with the charging handle. After installing all the components, double-check to make sure everything is properly secured and aligned. Once you’re satisfied with the assembly, you can test fire your AR15 to ensure it functions correctly. If you encounter any issues, troubleshoot and make any necessary adjustments. Building an upper receiver from scratch can be a challenging but rewarding project for competitive shooters looking to customize their AR15. By assembling your upper receiver, you have the flexibility to choose components that best suit your shooting style and preferences. With the right tools and knowledge, you can build a lightweight AR15 that meets your performance requirements and helps you excel in competition shooting.


