How to Replace Your Firearm’s Extractor Spring: A Comprehensive Guide
The extractor spring is a small but crucial component in the functioning of many firearms. It plays an essential role in ensuring reliable extraction of spent cartridges, thereby maintaining the smooth cycling of your firearm. Over time, the extractor spring can wear out, weaken, or break, leading to malfunctions such as failure to extract or stove-pipe jams. Knowing how to replace this spring yourself not only saves money but also ensures your firearm remains dependable when you need it most.
In this article, we will provide a detailed and well-researched guide on how to replace your firearm’s extractor spring. We’ll cover everything from understanding the role of the extractor spring to step-by-step replacement instructions, common issues, and tips for maintenance. Whether you are a beginner or an experienced shooter, this guide will give you valuable insights and practical advice.
Understanding the Extractor Spring and Its Importance
The extractor spring is part of the extractor assembly, which is responsible for pulling spent casings out of the chamber after firing. It provides tension to the extractor claw so that it grips the rim of the cartridge firmly enough to remove it from the chamber but not so tightly as to cause damage.
Why is this important?
-
Reliable cycling: Without proper tension from the extractor spring, spent casings may remain stuck in the chamber causing stoppages.
-
Safety: Failure to extract can cause dangerous malfunctions that interrupt shooting and potentially cause damage.
-
Longevity: Maintaining extractor spring health helps prolong overall firearm lifespan and ensures consistent performance.
A study by a major firearms manufacturer found that extractor-related malfunctions account for nearly 30% of common stoppages reported during testing phases. These statistics underscore how vital it is to maintain and replace worn extractor springs timely.
Signs Your Extractor Spring Needs Replacement
Recognizing when your extractor spring needs replacement is critical before problems escalate. Here are some common symptoms:
-
Failure to extract: Spent casings get stuck in the chamber or require manual removal.
-
Double feeds or jams: When extraction isn’t smooth, rounds may not cycle properly causing feeding issues.
-
Visible wear or damage: Upon inspection, you might notice deformation, rust, or breakage in the spring.
-
Reduced tension: The extractor claw feels loose or does not snap back properly when tested.
If you experience any of these symptoms during range sessions or routine cleaning, it’s time to consider replacing your extractor spring before more serious malfunctions occur.
Tools and Materials Needed for Replacement
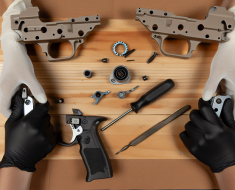
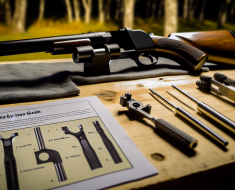
Before starting the replacement process, gather all necessary tools and materials. Having everything ready will streamline your work and reduce frustration.
-
A new extractor spring compatible with your firearm model (always purchase OEM parts or high-quality aftermarket replacements)
-
A set of gunsmithing screwdrivers (to avoid damaging screws)
-
A punch set (for removing pins)
-
A small hammer or mallet
-
Tweezers or needle-nose pliers (to handle small springs)
-
A clean workspace with good lighting
-
A gunsmithing mat or towel (to prevent parts rolling away)
-
Screw holders or magnetic trays (optional but helpful)
Having these items prepared beforehand can save time and prevent lost parts during disassembly and reassembly.
Step-by-Step Guide: How to Replace Your Firearm’s Extractor Spring
The exact procedure varies depending on your firearm make and model. However, most semi-automatic pistols and rifles follow similar principles in their extractor assemblies. Below is a general guide; always consult your firearm’s manual for specific instructions and safety protocols.
Step 1: Ensure Safety First
The most important step before working on any firearm is ensuring it is unloaded. Remove the magazine if applicable, open the action, visually inspect both chamber and magazine well multiple times to confirm no ammunition is present.
Step 2: Field Strip Your Firearm
Disassemble your firearm into its basic components – typically slide/barrel/frame for pistols or bolt/carrier/receiver for rifles. This exposes access to the extractor assembly within either the slide or bolt carrier group depending on design.
Step 3: Locate and Remove Extractor Assembly
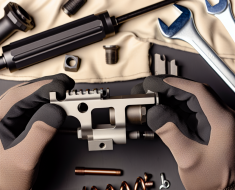
The extractor assembly usually consists of three main parts: the claw/extractor itself, its pin retaining it in place, and the extractor spring providing tension. Using appropriate punches and screwdrivers:
-
Remove any screws or pins holding down the extractor pin retaining clip if present.
-
Punch out the pin carefully without damaging surrounding components.
-
Extractor claw should be inspected for wear or damage before proceeding. If it appears to be in good condition, you can now install the new extractor spring by reversing the removal process.
Always ensure proper reassembly and function check before using your firearm again.