“Troubleshoot like a Pro – Learn How to Fix Common AR15 Malfunctions!”
Step-by-Step Guide to Troubleshooting Common AR15 Malfunctions
Step 1: Identify the Malfunction
The first step in troubleshooting any AR15 malfunction is to identify the exact issue. Common malfunctions include failure to feed, failure to extract, failure to fire, and double-feeds.
Step 2: Inspect the Weapon
Once the malfunction has been identified, the next step is to inspect the weapon. Check for any visible signs of damage or wear, such as broken or worn parts, dirt, or debris.
Step 3: Check the Ammunition
Next, inspect the ammunition. Make sure the ammunition is clean and in good condition. Check for any signs of damage or wear, such as dents, scratches, or corrosion.
Step 4: Clean the Weapon
If the weapon and ammunition appear to be in good condition, the next step is to clean the weapon. Use a cleaning rod and patch to clean the barrel and chamber. Make sure to clean the bolt and bolt carrier group as well.

Step 5: Check the Gas System
Once the weapon has been cleaned, the next step is to check the gas system. Make sure the gas tube is properly aligned and that the gas port is clear.
Step 6: Check the Bolt and Bolt Carrier Group
Next, inspect the bolt and bolt carrier group. Make sure the bolt is properly seated and that the extractor is in good condition.
Step 7: Check the Magazine
Finally, inspect the magazine. Make sure the magazine is clean and in good condition. Check for any signs of damage or wear, such as dents, scratches, or corrosion.
Step 8: Test Fire the Weapon
Once all of the above steps have been completed, the next step is to test fire the weapon. Make sure to use quality ammunition and to fire from a safe distance. If the weapon functions properly, the issue has been resolved. If the issue persists, further troubleshooting may be necessary.
How to Diagnose and Fix AR15 Malfunctions in the Field
Diagnosing and fixing malfunctions in an AR15 rifle in the field can be a daunting task. However, with the right knowledge and tools, it is possible to quickly identify and repair the issue. This guide will provide a step-by-step process for diagnosing and fixing AR15 malfunctions in the field.
Step 1: Identify the Malfunction
The first step in diagnosing and fixing an AR15 malfunction is to identify the type of malfunction. Common AR15 malfunctions include failure to feed, failure to fire, failure to extract, and double-feeds.
Failure to feed: The bolt does not pick up a round from the magazine and chamber it.
Failure to fire: The round is chambered but does not fire when the trigger is pulled.
Failure to extract: The spent casing is not ejected from the chamber.
Double-feed: Two rounds are picked up from the magazine and attempt to be chambered at the same time.
Step 2: Inspect the Rifle
Once the malfunction has been identified, the next step is to inspect the rifle. Start by inspecting the magazine to ensure it is properly loaded and seated. Check the chamber to make sure it is clear of any obstructions. Inspect the bolt and bolt carrier assembly for any signs of damage or wear.
Step 3: Clean and Lubricate
If no obvious signs of damage or wear are present, the next step is to clean and lubricate the rifle. Start by cleaning the chamber, bolt, and bolt carrier assembly with a bore snake or cleaning rod. Make sure to remove any dirt, debris, or carbon buildup. Once the parts are clean, lubricate them with a quality gun oil.
Step 4: Troubleshoot
If the rifle is still malfunctioning, the next step is to troubleshoot the issue. Start by checking the gas system for any signs of damage or wear. Make sure the gas rings are in good condition and the gas port is clear. If the gas system is in good condition, check the buffer and buffer spring for any signs of damage or wear.
Step 5: Replace Parts
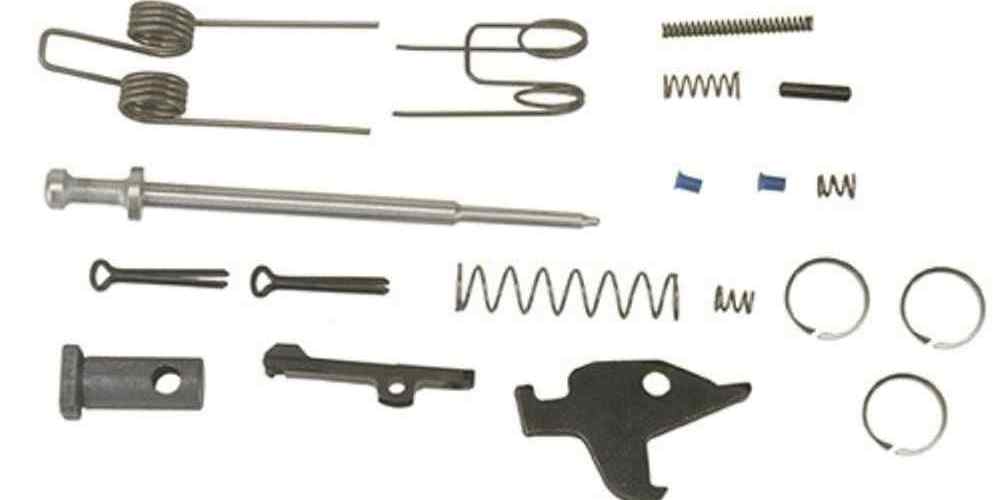
If the troubleshooting process does not identify the issue, the next step is to replace any worn or damaged parts. Start by replacing the magazine, then the bolt and bolt carrier assembly. If the issue persists, replace the buffer and buffer spring.
Conclusion
Diagnosing and fixing AR15 malfunctions in the field can be a daunting task. However, with the right knowledge and tools, it is possible to quickly identify and repair the issue. This guide provided a step-by-step process for diagnosing and fixing AR15 malfunctions in the field. Start by identifying the malfunction, then inspect the rifle, clean and lubricate it, and troubleshoot the issue. If the issue persists, replace any worn or damaged parts.
Understanding AR15 Malfunction Causes and How to Prevent Them
AR15s are popular firearms used for a variety of purposes, from hunting to target shooting to home defense. However, like any firearm, they can malfunction, leading to potentially dangerous situations. Understanding the causes of AR15 malfunctions and how to prevent them is essential for safe and effective use of the weapon.
The most common cause of AR15 malfunctions is a failure to feed, which occurs when the bolt fails to strip a round from the magazine and chamber it. This can be caused by a number of factors, including a dirty or damaged magazine, a weak or broken magazine spring, or a dirty or damaged chamber. To prevent this type of malfunction, it is important to keep the magazine and chamber clean and free of debris, and to inspect the magazine spring for signs of wear or damage.
Another common cause of AR15 malfunctions is a failure to extract, which occurs when the bolt fails to extract the spent cartridge from the chamber. This can be caused by a dirty or damaged chamber, a weak or broken extractor spring, or a dirty or damaged extractor. To prevent this type of malfunction, it is important to keep the chamber and extractor clean and free of debris, and to inspect the extractor spring for signs of wear or damage.
Finally, a third common cause of AR15 malfunctions is a failure to fire, which occurs when the firing pin fails to strike the primer of the cartridge. This can be caused by a weak or broken firing pin spring, a dirty or damaged firing pin, or a dirty or damaged chamber. To prevent this type of malfunction, it is important to keep the firing pin and chamber clean and free of debris, and to inspect the firing pin spring for signs of wear or damage.
By understanding the causes of AR15 malfunctions and how to prevent them, users can ensure that their weapon is functioning properly and safely. Regular cleaning and maintenance, as well as regular inspection of the magazine, chamber, extractor, firing pin, and springs, are essential for safe and effective use of the AR15.
AR15 Troubleshooting Tips: What to Do When Your Rifle Stops Firing
When your AR15 rifle stops firing, there are several potential causes that should be investigated. The following troubleshooting tips can help you identify and resolve the issue.
1. Check the magazine. Make sure the magazine is properly seated and that it is not damaged or blocked. If the magazine is damaged, replace it with a new one.
2. Check the chamber. Make sure the chamber is clear of any obstructions or debris. If the chamber is blocked, clear it with a cleaning rod.
3. Check the firing pin. Make sure the firing pin is not damaged or stuck. If the firing pin is damaged, replace it with a new one.
4. Check the gas system. Make sure the gas system is functioning properly and that the gas port is not blocked. If the gas system is blocked, clean it with a cleaning rod.
5. Check the bolt carrier group. Make sure the bolt carrier group is properly lubricated and that the extractor is not damaged or stuck. If the extractor is damaged, replace it with a new one.
6. Check the trigger. Make sure the trigger is functioning properly and that the trigger spring is not damaged or stuck. If the trigger spring is damaged, replace it with a new one.
7. Check the ammunition. Make sure the ammunition is not damaged or blocked. If the ammunition is damaged, replace it with new ammunition.
By following these troubleshooting tips, you should be able to identify and resolve the issue with your AR15 rifle. If the issue persists, contact a qualified gunsmith for further assistance.


