“Ensure Precision, Maintain Performance: Master AR15 Trigger Assembly Troubleshooting.”
Common AR-15 Trigger Assembly Issues and How to Fix Them
Trigger Assembly Troubleshooting in AR15s
The AR-15 is a popular firearm known for its modularity and reliability, but like any mechanical device, it can encounter issues, particularly within the trigger assembly. Understanding common trigger assembly problems and their solutions can help ensure your AR-15 functions smoothly and safely.
One of the most frequent issues with AR-15 trigger assemblies is a gritty or inconsistent trigger pull. This can often be attributed to a lack of lubrication or the presence of debris within the trigger mechanism. To address this, first, ensure that the firearm is unloaded and safe to handle. Disassemble the trigger assembly according to the manufacturer’s instructions and inspect it for dirt, carbon buildup, or any foreign material. Clean all components with a solvent designed for firearms, and then apply a high-quality gun lubricant sparingly to the moving parts. Reassemble the trigger mechanism, being careful not to over-lubricate, as excess oil can attract more dirt.
Another common problem is trigger slap or a sharp recoil felt in the trigger finger upon firing. This can be caused by a malfunctioning disconnector or an improperly installed hammer spring. To remedy this, check the disconnector for wear or damage and replace it if necessary. Additionally, verify that the hammer spring is installed correctly, with the ends of the spring resting on top of the trigger pin and not underneath it. This ensures proper tension and function of the hammer and disconnector.
Trigger creep, where the trigger does not break crisply and has a perceptible movement before firing, can also be a concern. This may be due to a worn sear or hammer engagement surfaces. Inspecting these parts for wear and replacing them if needed can improve the trigger pull. For those with the technical skill, polishing the engagement surfaces can also lead to a smoother trigger action, but this should be done with caution to avoid altering the geometry of the components.
Sometimes, the trigger may fail to reset after a shot is fired, which can be particularly dangerous as it may lead to a failure to fire or a double discharge. This issue is often related to the trigger or hammer springs being installed incorrectly or being too weak. Check the orientation of the springs and replace them if they show signs of fatigue or if they are not providing enough force to reset the trigger.
Lastly, a trigger that won’t function at all could be due to a number of factors, including a broken trigger or hammer pin, a seized trigger assembly, or an obstruction in the fire control group. Inspect the pins for any signs of damage or movement and replace them if necessary. If the assembly is seized, a thorough cleaning and lubrication may resolve the issue. If an obstruction is found, remove it carefully and ensure that all parts are free to move as intended.
In conclusion, while the AR-15 is a robust platform, its trigger assembly can experience a range of issues that affect performance. By familiarizing yourself with these common problems and their solutions, you can maintain your AR-15’s trigger assembly and ensure its reliability. Remember to always follow safety protocols when handling firearms and consult a professional gunsmith if you are unsure about performing any maintenance or repairs. With proper care and troubleshooting, your AR-15’s trigger should provide a smooth and consistent performance for years to come.

Step-by-Step Guide to Diagnosing Trigger Problems in AR-15s
Trigger Assembly Troubleshooting in AR15s
The AR-15 is a popular firearm known for its modularity and reliability. However, like any mechanical device, it can experience issues, and one of the more common problems involves the trigger assembly. Diagnosing trigger problems in an AR-15 can be a straightforward process if approached methodically. This step-by-step guide will help you troubleshoot your AR-15’s trigger assembly with a technical yet friendly approach.
Firstly, ensure that your firearm is unloaded and safe to handle. Remove the magazine, clear the chamber, and visually inspect to confirm that the firearm is indeed empty. Safety should always be your top priority when handling firearms.
Begin by checking the trigger’s basic functionality. With the rifle pointed in a safe direction, attempt to dry fire the weapon. If the trigger does not release the hammer, or if it feels unusually stiff, there may be an obstruction or a problem with the trigger’s components. Conversely, if the trigger feels too loose, it could indicate a broken spring or an issue with the disconnector.
Next, disassemble the rifle to access the trigger assembly. Remove the two takedown pins and separate the upper receiver from the lower receiver. This will give you a clear view of the trigger mechanism. Inspect the trigger, hammer, disconnector, and springs for any visible signs of wear, damage, or debris. Sometimes, accumulated dirt or fouling can impede the trigger’s movement or cause it to malfunction.
If everything appears clean and undamaged, reassemble the lower receiver and perform a function check. Cock the hammer, engage the safety, and attempt to pull the trigger. The hammer should not fall when the safety is engaged. If it does, this indicates a problem with the safety mechanism, which could be as simple as a misalignment or as complex as a broken safety detent.
Should the safety function correctly, disengage it and pull the trigger while holding the hammer to prevent it from striking the lower receiver. The hammer should fall. Now, while holding the trigger to the rear, manually cock the hammer. It should catch on the disconnector. When you release the trigger, you should hear a distinct click as the disconnector releases the hammer to the primary sear. If this does not occur, the disconnector may be worn or improperly installed.
In the event that the trigger does not reset after firing, the issue could be related to the trigger spring or the buffer system. Ensure that the trigger spring is installed correctly, with its legs resting on top of the trigger pin and not underneath it. If the spring is correctly installed and the problem persists, inspect the buffer and buffer spring in the stock assembly to ensure they are not impeding the trigger’s reset.
If you’ve gone through these steps and the problem remains unresolved, it may be time to consider replacing individual components. High-quality aftermarket triggers can offer improved performance and reliability over stock triggers. When selecting a replacement, consider your specific needs, whether it’s for competitive shooting, hunting, or tactical applications.
In conclusion, diagnosing trigger problems in an AR-15 requires patience and attention to detail. By following this step-by-step guide, you can systematically identify and resolve common issues with the trigger assembly. Remember to always prioritize safety, work in a well-lit area, and consult your firearm’s manual or a professional gunsmith if you encounter any difficulties beyond your expertise. With the right approach, you can ensure your AR-15’s trigger is functioning smoothly and reliably for your shooting needs.
Enhancing AR-15 Performance: Tips for Maintaining Your Trigger Assembly
Trigger Assembly Troubleshooting in AR15s
Enhancing AR-15 Performance: Tips for Maintaining Your Trigger Assembly
The AR-15 is a versatile and widely used rifle, favored by enthusiasts and professionals alike for its modularity and performance. A critical component of this firearm is the trigger assembly, which is essential for the accurate and reliable operation of the rifle. Proper maintenance and troubleshooting of the trigger assembly are paramount for ensuring peak performance. In this article, we will delve into some technical tips and friendly advice to help you maintain your AR-15’s trigger assembly, ensuring it functions smoothly and reliably.
Firstly, it’s important to understand the basic components of the trigger assembly: the trigger itself, hammer, disconnector, and the springs that facilitate their movement. Regular cleaning is essential to prevent the buildup of dirt, debris, or fouling that can impede the trigger’s action. When cleaning, disassemble the components carefully and use a quality solvent to remove any grime. A soft brush can be used to gently scrub the parts, followed by a light application of lubricant to reduce friction and protect against corrosion.
However, even with diligent maintenance, issues can arise. A common problem is a gritty or inconsistent trigger pull, which can be caused by dirt accumulation or burrs on the components. To address this, after cleaning, inspect the surfaces of the trigger, hammer, and disconnector for any irregularities. If you find any small burrs or rough spots, a fine stone or sandpaper can be used to smooth them out, but be cautious not to alter the geometry of the parts.
Another issue that may arise is trigger slap or a double-firing condition, which can be dangerous. This is often due to a malfunctioning disconnector or worn springs. Inspect the disconnector for proper engagement with the hammer and replace it if necessary. Similarly, check the springs for signs of wear or fatigue and replace them if they no longer provide the necessary tension. It’s crucial to use high-quality replacement parts that meet the original specifications to maintain the integrity of the trigger assembly.
Trigger creep, where the trigger moves excessively before releasing the hammer, can also affect accuracy. This can be caused by improper engagement between the sear and hammer surfaces. A professional gunsmith can adjust the engagement surfaces to reduce creep, but this is a delicate process that requires expertise to avoid compromising the safety of the firearm.
Additionally, a trigger that fails to reset after firing can be a sign of a weak or broken trigger spring. In this case, replacing the spring is usually the solution. Always ensure that the spring is installed correctly, as an improperly seated spring can lead to malfunctions.
Lastly, it’s worth considering an upgrade to an aftermarket trigger assembly if you’re looking for a crisper, more refined trigger pull. Many aftermarket options offer improved ergonomics and performance, but make sure to choose a reputable manufacturer and ensure compatibility with your AR-15.
In conclusion, maintaining your AR-15’s trigger assembly is a key aspect of ensuring the rifle’s performance and reliability. Regular cleaning, careful inspection, and prompt replacement of worn parts will go a long way in preventing common trigger issues. Remember that while some troubleshooting and maintenance can be done at home, certain adjustments should be left to a professional gunsmith to maintain safety and functionality. By following these tips and addressing problems as they arise, you can keep your AR-15’s trigger assembly in top condition, providing you with a smooth and reliable shooting experience.
AR-15 Trigger Assembly Upgrades: What You Need to Know
Trigger Assembly Troubleshooting in AR15s
The AR-15 is a popular firearm among enthusiasts for its modularity and the ease with which it can be customized. One of the most common upgrades is the trigger assembly, which can significantly improve the shooting experience. However, even with high-quality components, issues can arise that require troubleshooting. Understanding the intricacies of the AR-15 trigger assembly and how to address common problems is essential for any owner looking to maintain or upgrade their rifle.
When upgrading your AR-15 trigger assembly, it’s important to first familiarize yourself with the basic components: the trigger itself, the hammer, the disconnector, and the springs that facilitate the movement of these parts. Each component must work in harmony to ensure a crisp, clean trigger pull. If you’re experiencing a gritty or inconsistent trigger pull, the culprit may often be found in the installation or condition of these parts.
One of the first steps in troubleshooting is to ensure that all components are properly installed. An incorrectly seated spring or a misaligned pin can lead to malfunctions. It’s crucial to follow the manufacturer’s instructions carefully and double-check your work. If you’re not confident in your ability to install the trigger assembly correctly, it’s wise to seek the assistance of a professional gunsmith.
Another common issue is the buildup of dirt and debris, which can impede the smooth operation of the trigger assembly. Regular cleaning and maintenance are key to preventing such problems. When cleaning, pay special attention to the crevices around the trigger and hammer, as well as the disconnector. A clean assembly is more likely to function reliably and provide the improved performance you’re seeking from an upgrade.
If you’ve installed a new trigger and are still experiencing issues, it may be necessary to look at the compatibility of the trigger with other components in your lower receiver. Not all triggers are created equal, and some may require specific tolerances to function correctly. It’s also possible that wear and tear on other parts of the rifle could be affecting the performance of your new trigger. Inspecting and replacing worn parts can often resolve these issues.
Trigger pull weight is another aspect to consider when troubleshooting. Aftermarket triggers often allow for adjustments to the pull weight, which can be fine-tuned to your preference. However, setting the pull weight too light can lead to unintentional discharges, while setting it too heavy can make the rifle more difficult to fire accurately. Finding the right balance is key, and it may take some experimentation to get it just right.
Lastly, it’s important to remember that safety should always be your top priority when working on your firearm. Always ensure that the rifle is unloaded before beginning any work, and be mindful of the potential for springs and other small parts to become airborne during disassembly. Wear eye protection and work in a well-lit area to minimize the risk of accidents.
In conclusion, upgrading the trigger assembly in your AR-15 can greatly enhance your shooting experience, but it’s not without its potential pitfalls. By understanding the components involved, ensuring proper installation, maintaining cleanliness, checking for compatibility, adjusting pull weight appropriately, and prioritizing safety, you can troubleshoot most issues that arise. With patience and attention to detail, you can achieve a trigger assembly that performs to your expectations and elevates your AR-15’s performance to new heights.
Troubleshooting AR-15 Trigger Assembly: Expert Advice for Smooth Operation
Trigger Assembly Troubleshooting in AR15s
The AR-15 is a popular firearm known for its modularity and ease of customization, including its trigger assembly. However, even the most reliable systems can encounter issues, and troubleshooting the trigger assembly of an AR-15 can be a daunting task for both novice and experienced shooters alike. Understanding the common problems and how to address them is essential for maintaining a smooth and reliable operation.
One of the first steps in troubleshooting is to ensure that the firearm is unloaded and safe to handle. Safety should always be the primary concern when working on any firearm. Once you’ve established a safe environment, you can begin diagnosing trigger-related issues.
A common problem with AR-15 trigger assemblies is a gritty or inconsistent trigger pull. This can often be attributed to a lack of lubrication or the presence of debris within the trigger mechanism. To resolve this, disassemble the trigger assembly according to the manufacturer’s instructions and carefully clean all components. A high-quality gun solvent can help remove stubborn residue, while a light application of gun oil can ensure smooth movement of the parts. It’s important to avoid over-lubrication, as excess oil can attract dirt and lead to further malfunctions.
Another issue that may arise is trigger slap or a sharp recoil felt in the trigger finger upon firing. This can be caused by a malfunctioning disconnector or improper installation of the trigger components. Inspect the disconnector for wear or damage and replace it if necessary. Additionally, check that the springs are installed correctly and providing the right amount of tension. Incorrect spring installation can lead to a host of trigger issues, including a failure to reset.
Trigger creep, where the trigger moves rearward significantly before the hammer falls, can be particularly frustrating. This is often due to an improperly adjusted trigger or a worn sear. Aftermarket triggers usually come with instructions for adjustment, and following these closely can help eliminate creep. If the sear is worn, it may need to be replaced or serviced by a professional gunsmith.
In some cases, the trigger may fail to reset after a shot is fired, which can be alarming and potentially dangerous. This malfunction could be due to a broken or weak trigger or hammer spring. Inspect these springs for signs of damage or fatigue and replace them if necessary. It’s also wise to check the alignment of the trigger assembly components, as misalignment can impede the trigger’s ability to reset.
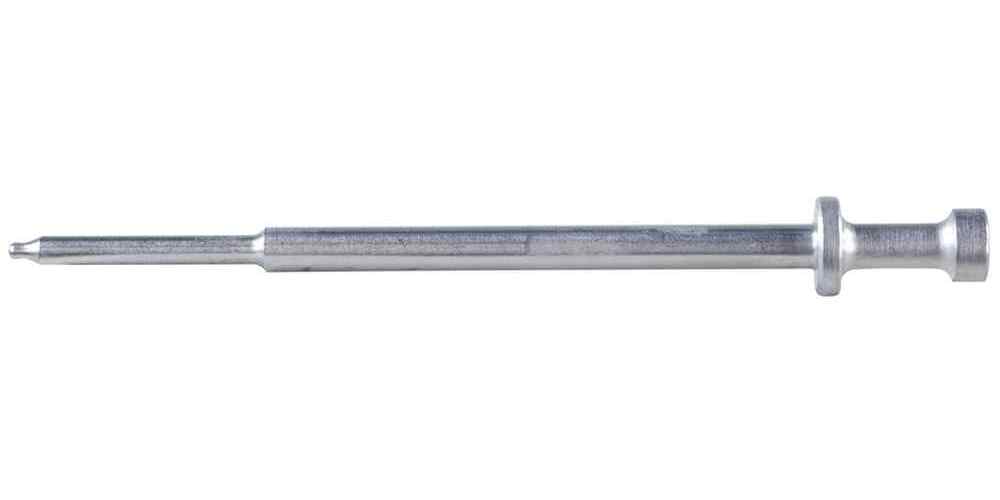
Lastly, if you’re experiencing light primer strikes, the issue may not be with the trigger assembly itself but with the hammer or firing pin. A worn or damaged firing pin can result in insufficient force being transferred to the primer. Similarly, a hammer with a compromised spring may not provide the necessary energy for ignition. Replacing these components can often resolve light primer strike issues.
In conclusion, while the AR-15 is a robust and reliable platform, its trigger assembly can still present challenges. By methodically addressing each potential issue—whether it’s a matter of cleaning, lubrication, component wear, or improper installation—you can ensure that your AR-15’s trigger operates smoothly and reliably. Remember to always prioritize safety, follow the manufacturer’s guidelines, and seek professional assistance if you’re unsure about any aspect of the troubleshooting process. With a little patience and attention to detail, you can keep your AR-15’s trigger assembly in top condition, providing you with a crisp and responsive shooting experience.


